Batch Process.
I shall go through of how I used Batch Processing in Photoshop.
Using the actions palette in photoshop, I can record all of those little things. I prepare my photos and then I click "replay" them to instantly complete the same list of tasks of numerous of images. This process is called a batch operation as it can save you a ton of time since you'll be able to zip through each of them the same, tasks any number of times with a single click of the mouse.
For this I used my own photographs for the part in my research called 'My Journey' and also whilst I am explaining I will be using my own screen shots. Here is the batch process;
To begin, open a large digital image in photoshop. As I said before i'll be using "My Journey" images to record the action I will need to automate.
1. Go to window > Actions to bring up the Actions palette
2. Click Create new action and type "resize for web"
3. Click Record
4. In the main photoshop menu bar, go to Image > Image size
5. Select "Pixels" from the drop-down menu next to width
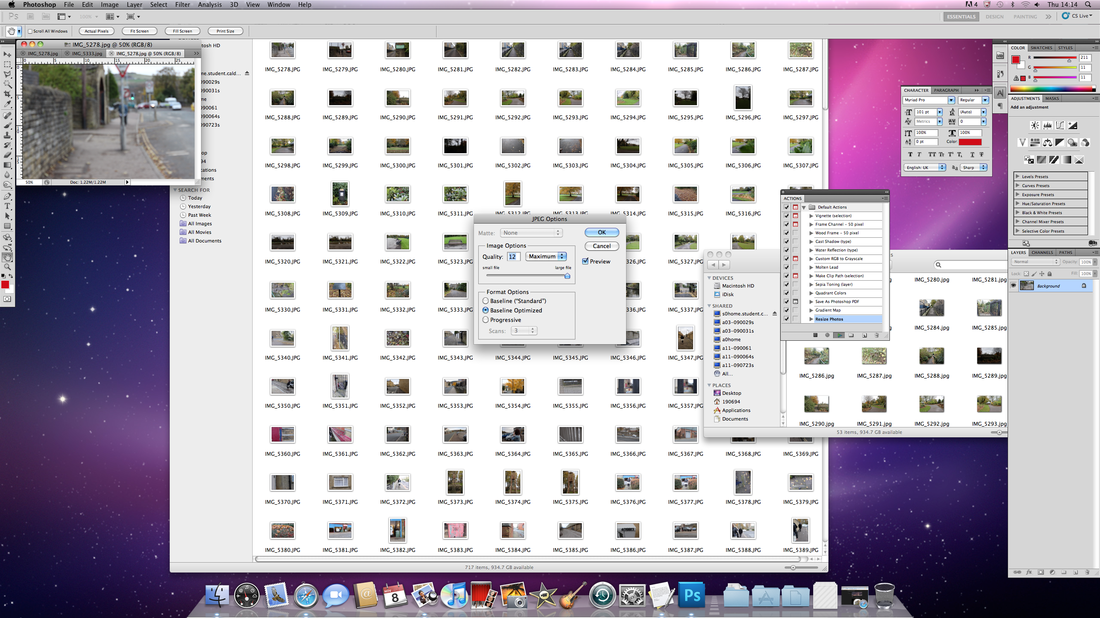
6. Type in "600" or any other small size and click OK.
7. Go to the actions palette and click on the stop button to stop recording.
You should see a new action in your palette, like this image below;
Using the actions palette in photoshop, I can record all of those little things. I prepare my photos and then I click "replay" them to instantly complete the same list of tasks of numerous of images. This process is called a batch operation as it can save you a ton of time since you'll be able to zip through each of them the same, tasks any number of times with a single click of the mouse.
For this I used my own photographs for the part in my research called 'My Journey' and also whilst I am explaining I will be using my own screen shots. Here is the batch process;
To begin, open a large digital image in photoshop. As I said before i'll be using "My Journey" images to record the action I will need to automate.
1. Go to window > Actions to bring up the Actions palette
2. Click Create new action and type "resize for web"
3. Click Record
4. In the main photoshop menu bar, go to Image > Image size
5. Select "Pixels" from the drop-down menu next to width
6. Type in "600" or any other small size and click OK.
7. Go to the actions palette and click on the stop button to stop recording.
You should see a new action in your palette, like this image below;
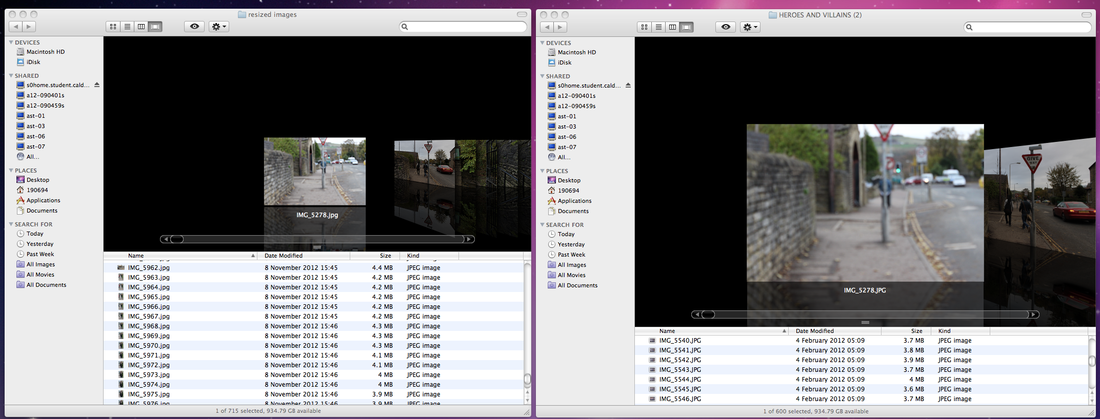
Here's the part where I get "My Journey" images lined up and resized all of them at once. Start by creating two folders on your desktop. Name one "Originals" and name the other "Resized." Dump all of the images you want to batch, resize into the "Originals" folder, then;
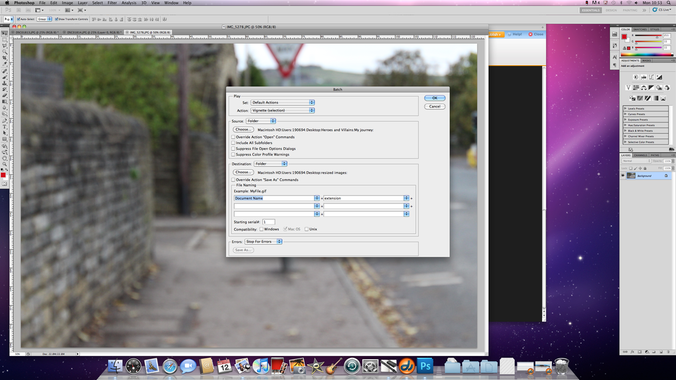
1. Go to file > Automate > Batch to bring up the Batch dialog
2. Under the play header, find the "resize for web" action you just recored in the actions of the drop down list.
3. Under the source header, select "folder" in the drop down list and click choose. Navigate to the "originals" folder you just created on your desktop
4. Check the boxes to suppress warnings and options dialogs
5. Under the destination header, select "folder" and then in the drop down list click choose. Navigate to the "resized" folder you just created on your desktop
6. If I wanted to change the names of my files, I can do here under the file naming sub-header. We'd recommend selecting "2 Digit Serial Number" and keeping the extension
7. Make sure your photo's will be viewable to all by checking all of the "compatibility" boxes.
8. Click OK.